Manage Projects with Redmine on Debian 6 (Squeeze)
DeprecatedThis guide has been deprecated and is no longer being maintained.
This guide will help you install Redmine on your Debian 6 (Squeeze) Linode. It is assumed that you’ve already followed the steps outlined in our getting started guide. Please make sure you’re logged into your Linode as root via an SSH session before proceeding. Throughout this guide, the example domain “example.com” is used. Please be sure to replace it with your own domain name wherever it is found.
Set the Hostname
Before you begin installing and configuring the components described in this guide, please make sure you’ve followed our instructions for setting your hostname. Issue the following commands to make sure it is set properly:
hostname
hostname -f
The first command should show your short hostname, and the second should show your fully qualified domain name (FQDN).
Install Rails Packages and nginx with Phusion Passenger
Issue the following commands to update your local package database and install any outstanding updates.
apt-get update
apt-get upgrade --show-upgraded
Issue the following command to install packages required for Ruby on Rails and other components.
apt-get install wget build-essential ruby1.8 ruby1.8-dev irb1.8 rdoc1.8 zlib1g-dev libpcre3-dev libopenssl-ruby1.8 libzlib-ruby libssl-dev libcurl4-openssl-dev libpq-dev postgresql subversion
Create symbolic links to the installed version of Ruby:
ln -s /usr/bin/ruby1.8 /usr/bin/ruby
ln -s /usr/bin/irb1.8 /usr/bin/irb
Fetch and install RubyGems version 1.5.3 by issuing the following commands:
wget http://rubyforge.org/frs/download.php/74343/rubygems-1.5.3.tgz
tar -xf rubygems*tgz
cd rubygems*
ruby setup.rb
ln -s /usr/bin/gem1.8 /usr/bin/gem
Install some required gems:
gem install -v=1.1.0 rack
gem install fastthread
gem install -v=2.3.5 rails
gem install -v=0.4.2 i18n
gem install postgres
gem install pg
Proceed to the Phusion Passenger site and locate the link for the current source code tarball. Download it as follows (substitute the link for the current version):
cd /opt
wget http://rubyforge.org/frs/download.php/74471/passenger-3.0.5.tar.gz
tar xzvf passenger*.gz
Run the Phusion Passenger installer for Nginx:
cd passenger*/bin
./passenger-install-nginx-module
You’ll be greeted by the Phusion Passenger nginx installer program. Press “Enter” to continue with the installation. When prompted for the Nginx installation method, it is recommended that you choose “1” to allow the installer to automatically download, compile, and install nginx for you. Unless you have specific needs that would necessitate passing custom options to nginx at compile time, this is the safest way to proceed. Please do not remove the Passenger files from opt after the install. They need to stay in place or your install will not function correctly.
Next, create the file /etc/init.d/nginx with the following contents:
- File: /etc/init.d/nginx
 1
 2
 3
 4
 5
 6
 7
 8
 9
10
11
12
13
14
15
16
17
18
19
20
21
22
23
24
25
26
27
28
29
30
31
32
33
34
35
36
37
38
39
40
41
42
43
44
45
46
47
48
49
50
51
52
53
54
55
56
57
58
59
60
61
#!/bin/sh ### BEGIN INIT INFO # Provides: nginx # Required-Start: $all # Required-Stop: $all # Default-Start: 2 3 4 5 # Default-Stop: 0 1 6 # Short-Description: starts the nginx web server # Description: starts nginx using start-stop-daemon ### END INIT INFO PATH=/opt/nginx/sbin:/sbin:/bin:/usr/sbin:/usr/bin DAEMON=/opt/nginx/sbin/nginx NAME=nginx DESC=nginx test -x $DAEMON || exit 0 # Include nginx defaults if available if [ -f /etc/default/nginx ] ; then . /etc/default/nginx fi set -e case "$1" in start) echo -n "Starting $DESC: " start-stop-daemon --start --quiet --pidfile /opt/nginx/logs/$NAME.pid \ --exec $DAEMON -- $DAEMON_OPTS echo "$NAME." ;; stop) echo -n "Stopping $DESC: " start-stop-daemon --stop --quiet --pidfile /opt/nginx/logs/$NAME.pid \ --exec $DAEMON echo "$NAME." ;; restart|force-reload) echo -n "Restarting $DESC: " start-stop-daemon --stop --quiet --pidfile \ /opt/nginx/logs/$NAME.pid --exec $DAEMON sleep 1 start-stop-daemon --start --quiet --pidfile \ /opt/nginx/logs/$NAME.pid --exec $DAEMON -- $DAEMON_OPTS echo "$NAME." ;; reload) echo -n "Reloading $DESC configuration: " start-stop-daemon --stop --signal HUP --quiet --pidfile /opt/nginx/logs/$NAME.pid \ --exec $DAEMON echo "$NAME." ;; *) N=/etc/init.d/$NAME echo "Usage: $N {start|stop|restart|reload|force-reload}" >&2 exit 1 ;; esac exit 0
Issue the following commands the make the script executable and set it to start on boot:
chmod +x /etc/init.d/nginx
update-rc.d -f nginx defaults
Optional: Proxy Redmine with Apache
If you’re already running Apache on your Linode, you’ll need to tell nginx to run on a different port and proxy requests for your Redmine installation back to it. If you’re running another web server, you’ll need to perform similar steps to modify its configuration to support this. This section is entirely optional, and only applies to Apache users.
Issue the following commands to enable proxy support:
a2enmod proxy
a2enmod proxy_http
/etc/init.d/apache2 restart
Configure an Apache virtualhost for your Redmine installation. The example shown below assumes Apache is configured as recommended in our
Debian 6 LAMP guide. Remember to replace “12.34.56.78” with your Linode’s IP address, support@example.com with your administrative email address, and “redmine.example.com” with your Redmine domain.
- File: /etc/apache2/sites-available/redmine.example.com
 1
 2
 3
 4
 5
 6
 7
 8
 9
10
<VirtualHost *:80> ServerAdmin support@example.com ServerName redmine.example.com ProxyPass / http://localhost:8080/ ProxyPassReverse / http://localhost:8080/ # Uncomment the line below if your site uses SSL. #SSLProxyEngine On </VirtualHost>
Issue the following commands to enable the site and reload Apache:
a2ensite redmine.example.com
/etc/init.d/apache2 reload
Next, you’ll need to tell nginx to run on a different port. Edit your nginx configuration file, setting the following value:
- File: /opt/nginx/conf/nginx.conf
1listen 8080;
Install and Configure Redmine
Obtain Redmine
Check the
Redmine project site to find the current version number for the stable branch. Issue the following commands to use svn to check out the code, replacing the URL on the last line with an updated URL if necessary.
mkdir -p /srv/www/redmine.example.com
cd /srv/www/redmine.example.com/
svn co http://redmine.rubyforge.org/svn/branches/1.1-stable redmine-1.1
mv redmine-1.1 redmine
You can use svn up from the redmine directory to keep it up to date in the future.
Create and Configure the Database
Switch to the postgres user and start up the psql shell by issuing the following commands:
su - postgres
psql
Issue these commands in the psql shell to set up the database for Redmine. Be sure to specify a unique, strong password in place of “changeme”.
CREATE ROLE redmine LOGIN ENCRYPTED PASSWORD 'changeme' NOINHERIT VALID UNTIL 'infinity';
CREATE DATABASE redmine WITH ENCODING='UTF8' OWNER=redmine TEMPLATE=template0;
\q
exit
cd redmine
Create the file config/database.yml with the following contents, replacing “changeme” with the password you assigned in the last step.
- File: config/database.yml
1 2 3 4 5 6 7 8production: adapter: postgresql database: redmine host: localhost username: redmine password: changeme encoding: utf8 schema_search_path: public
Issue the following commands to complete database configuration:
chmod 600 config/database.yml
rake config/initializers/session_store.rb
RAILS_ENV=production rake db:migrate
RAILS_ENV=production rake redmine:load_default_data
If you receive an error message after issuing the rake db:migrate command, edit the config/environment.rb file to include the following excerpt between the bootstrap and initializer sections. After editing the file, retry the rake db:migrate command.
- File: config/environment.rb
 1
 2
 3
 4
 5
 6
 7
 8
 9
10
if Gem::VERSION >= "1.3.6" module Rails class GemDependency def requirement r = super (r == Gem::Requirement.default) ? nil : r end end end end
Configure Email Service
Issue the following commands to install exim4 and configure it for outgoing Internet email delivery. You can skip Exim installation if you already have an SMTP server configured that accepts unauthenticated locally sent mail, although you will still need to create Redmin’s email configuration file as shown at the end of the section.
apt-get install exim4
dpkg-reconfigure exim4-config
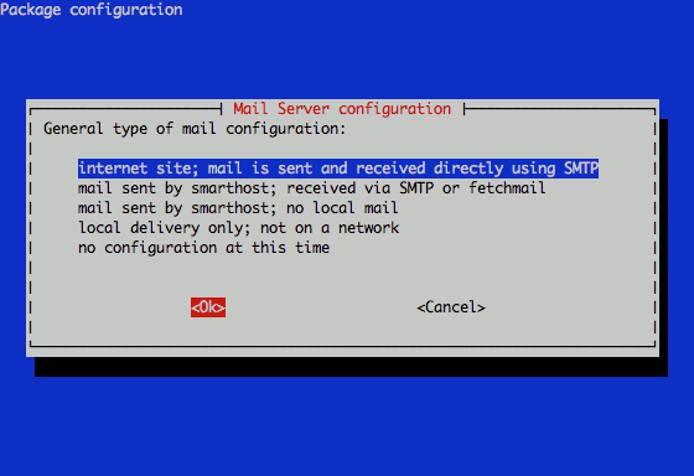
Select “internet site” as the type of mail configuration to use:
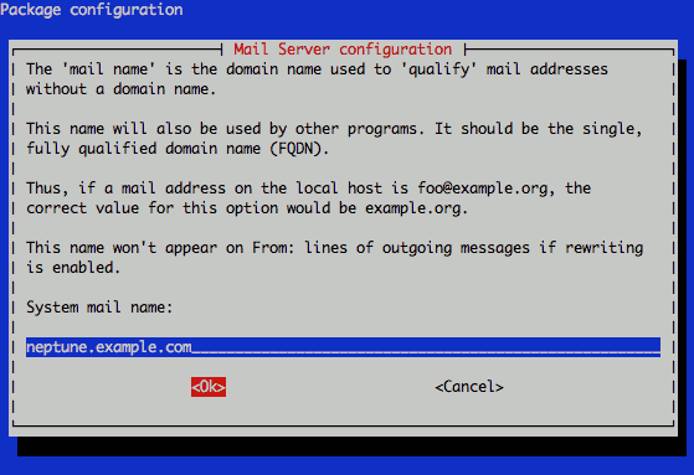
Specify your system’s fully qualified domain name as the system mail name:
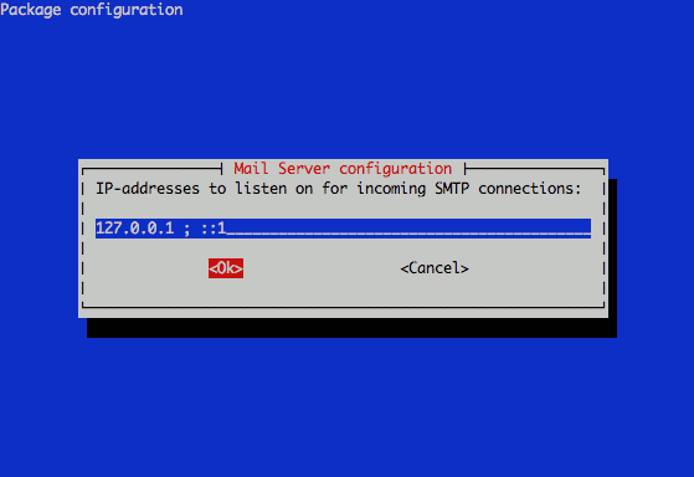
Enter “127.0.0.1” when asked for the IP address to listen on for SMTP connections. For purposes of allowing Redmine to send mail, you only want to listen on localhost.
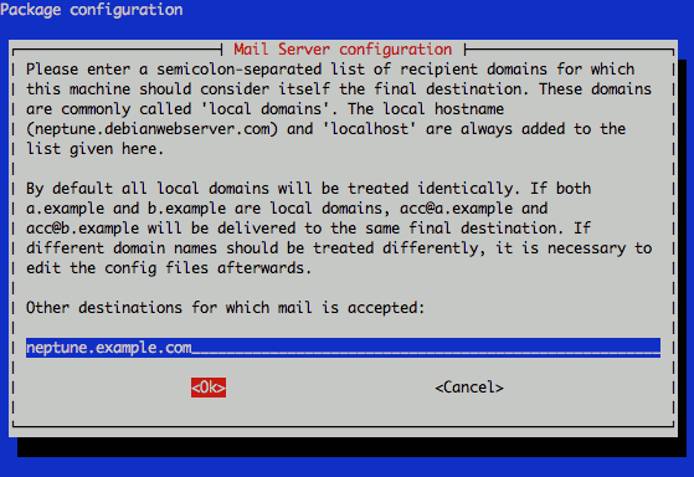
Enter “localhost.localdomain” and your fully qualified domain name when asked for the list of recipient domains.
Relay domains and machines should be left blank.
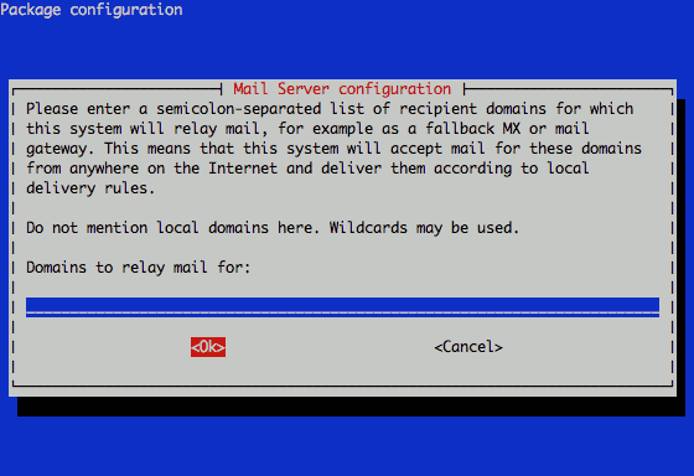
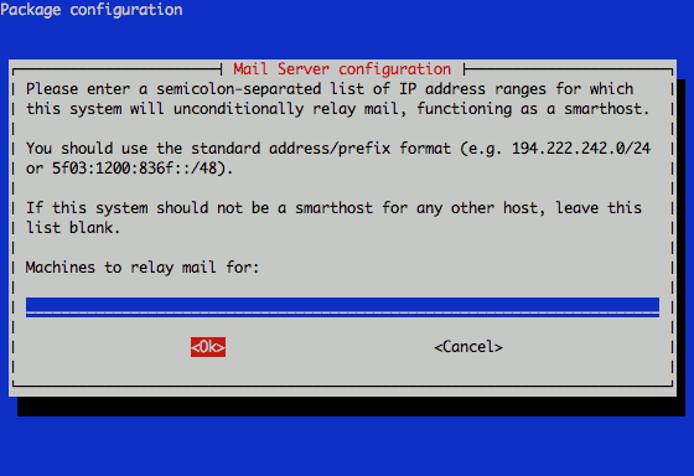
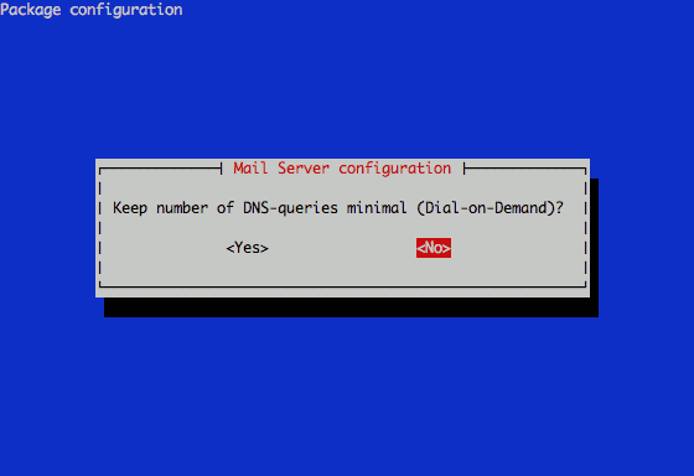
Specify “No” when asked about DNS queries.
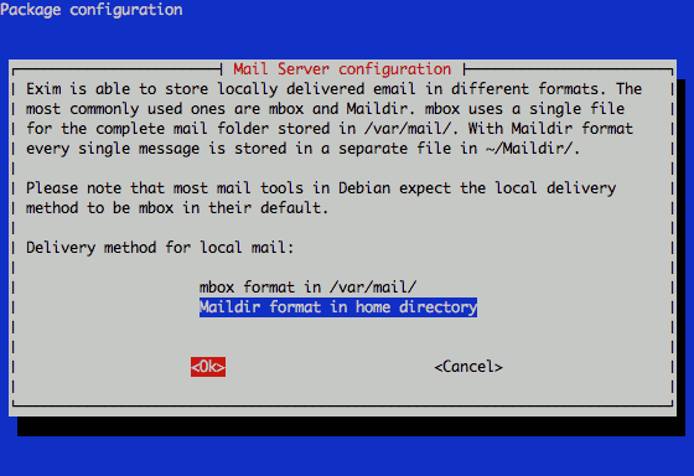
When asked about maildirs versus mbox format, you may choose either. Maildirs are increasingly preferred by many modern mail tools.
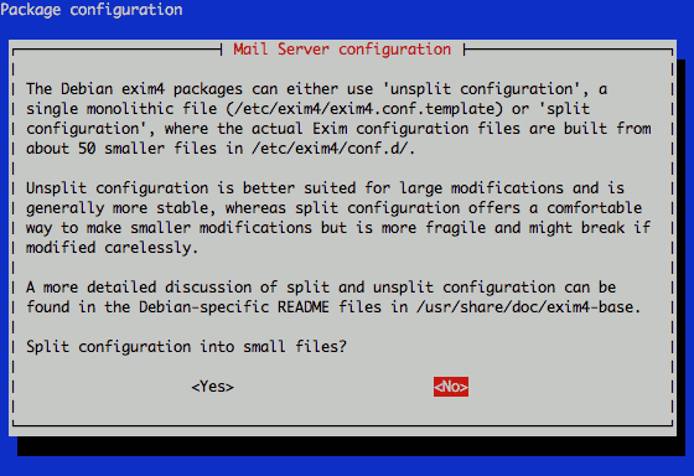
Specify “No” when asked whether to split the configuration into smaller files.
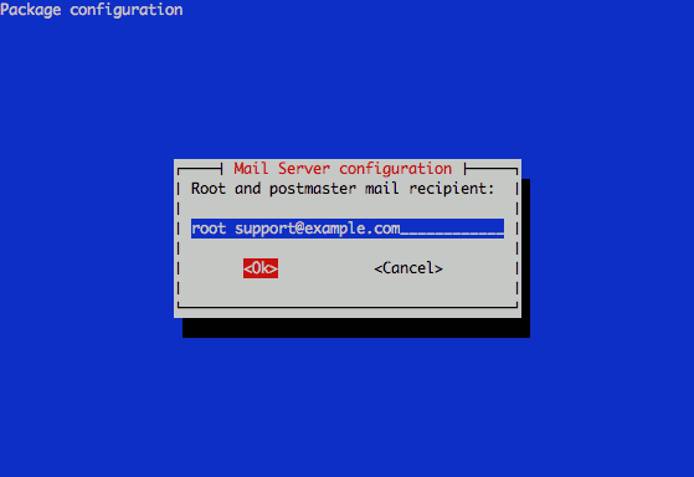
Enter “root” and an email address at your domain for the postmaster mail query.
Create the file config/email.yml and copy in the following contents. Be sure to replace the domain field with your fully qualified domain name.
- File: config/email.yml
1 2 3 4 5 6 7production: delivery_method: :smtp smtp_settings: address: 127.0.0.1 port: 25 domain: redmine.example.com authentication: :none
This completes email configuration for your Redmine installation.
Final Configuration and Testing
We’ll create a “redmine” user to manage the installation. Issue the following commands to set ownership and permissions on your Redmine files, taking care to assign a unique, strong password for the Redmine user:
adduser redmine
cd /srv/www/redmine.example.com/
chown -R redmine:redmine *
cd redmine
chmod -R 755 files log tmp public/plugin_assets
Edit the file /opt/nginx/conf/nginx.conf, setting the “user” parameter to “redmine”:
- File: /opt/nginx/conf/nginx.conf
1user redmine;
Add a server section after the first example server as follows. If you’re proxying to nginx from another web server, be sure to change the listen directive to listen 8080; instead of the default. Be sure to replace “redmine.example.com” with the domain for your Redmine site.
- File: /opt/nginx/conf/nginx.conf
 1
 2
 3
 4
 5
 6
 7
 8
 9
10
11
12
server { listen 80; server_name redmine.example.com; root /srv/www/redmine.example.com/redmine/public/; access_log /srv/www/redmine.example.com/redmine/log/access.log; error_log /srv/www/redmine.example.com/redmine/log/error.log; index index.html; location / { passenger_enabled on; allow all; } }
Start nginx:
/etc/init.d/nginx start
Your Redmine installation should be accessible at http://redmine.example.com; if you encounter issues, please refer to your log files for a listing of any errors that may have occurred. The default login is username “admin” and password “admin”. You should change the admin password immediately. Congratulations, you’ve installed Redmine for project management on your Linode!
Monitor for Software Updates and Security Notices
When running software compiled or installed directly from sources provided by upstream developers, you are responsible for monitoring updates, bug fixes, and security issues. After becoming aware of releases and potential issues, update your software to resolve flaws and prevent possible system compromise. Monitoring releases and maintaining up to date versions of all software is crucial for the security and integrity of a system.
Please monitor the Redmine project issue queue and news feed to ensure that you are aware of all updates to the software and can upgrade appropriately or apply patches and recompile as needed:
More Information
You may wish to consult the following resources for additional information on this topic. While these are provided in the hope that they will be useful, please note that we cannot vouch for the accuracy or timeliness of externally hosted materials.
This page was originally published on


